
Deliberations
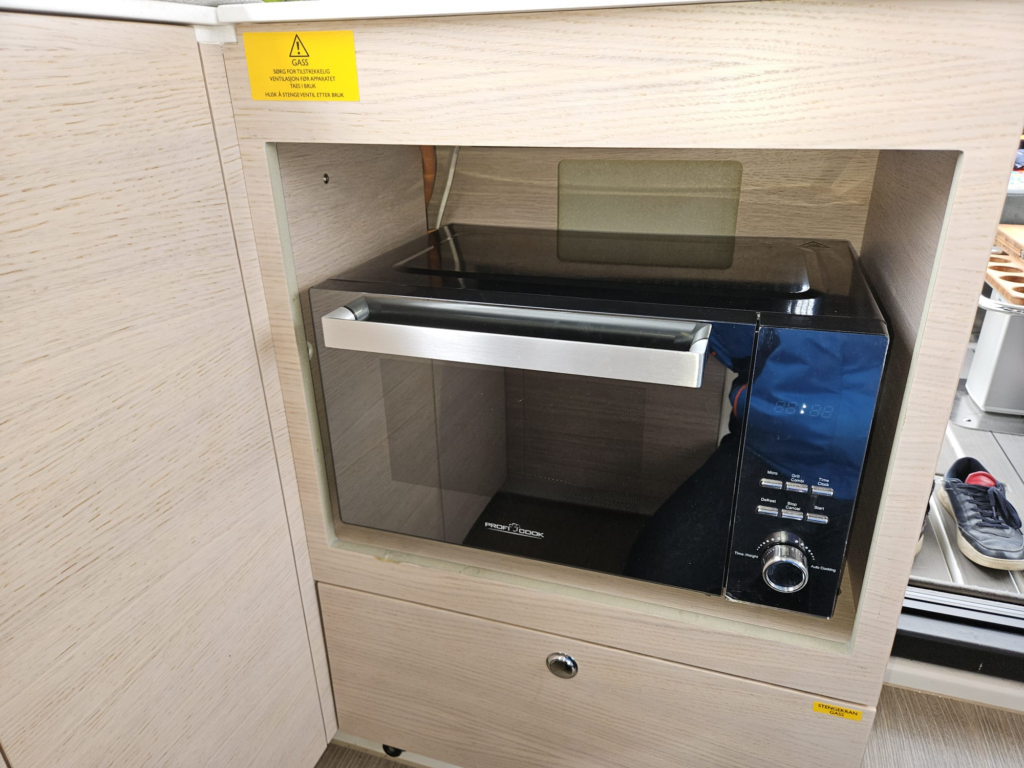
After living on the boat for 5 months over the last two seasons we did not use the built-in gas oven even once. It was still brand new. However, quickly warming up some food was quite inconvenient. While the ceramic gas cooktop is very innovative and easy to clean, it is still a ceramic cooktop, meaning that it takes a while to warm up, and then if you want to warm something up you always need to use a pot or pan…
This meant that eating any kind of leftovers or even making a bigger meal was a whole ordeal – reheating took way too much time and created more dirty dishes than necessary. The decision was made to replace the gas oven with a microwave – there is already a 3000W inverter onboard, so the power side is easy.
Removing the oven
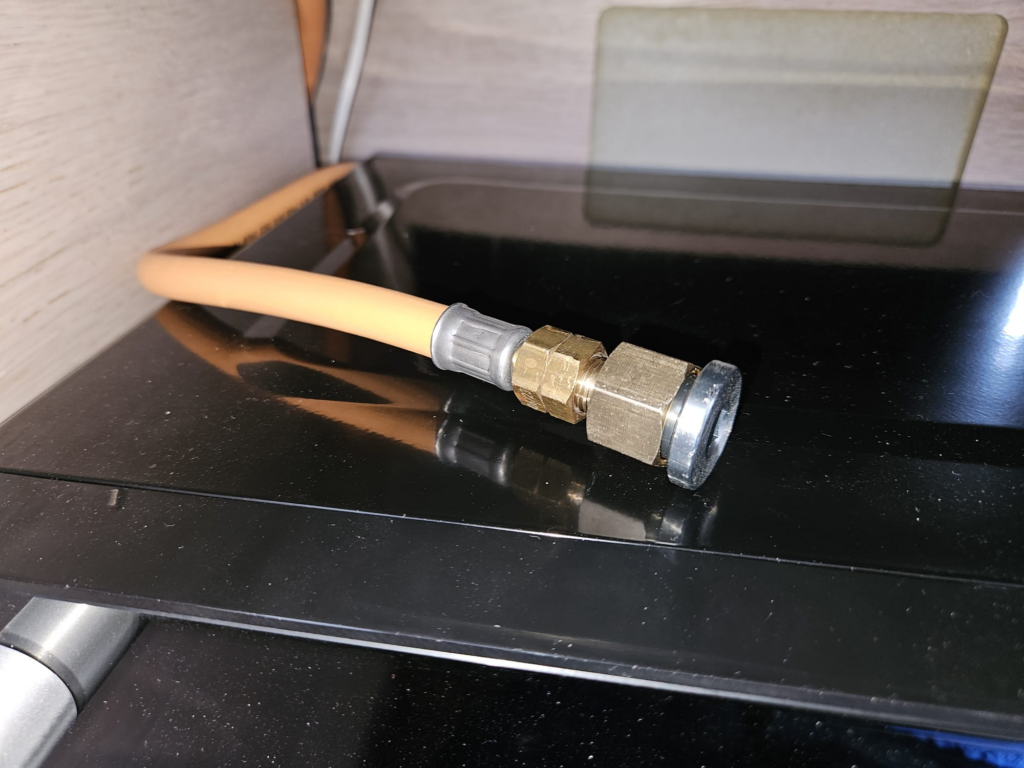
The oven does not have any power connection – the spark is created by an AA battery, so the only thing that needs to be taken care of is the gas connection. There is a tee with two valves, that has a dedicated shutoff for the oven, however I did not like leaving it open to atmosphere, as the potential to create a dangerous situation is very high (someone opens the valve by accident causing all the gas to leak into the cabin).
The oven uses something called a 1/4 G connection. This is a 1/4 BSP with reverse or left-hand thread. Finding a blanking plug for this proved to be impossible. The local hydraulic shops did not carry any 1/4 reverse thread at all – it is a gas specific thing. The gas companies did carry various fittings, but nothing for blanking it off.
So… Amazon to the rescue. Apparently there’s an adapter used in some BBQ grills, that has 1/4 G on one side (1/4 BSP outer left hand thread) and a normal 1/2 inner thread on the other side:
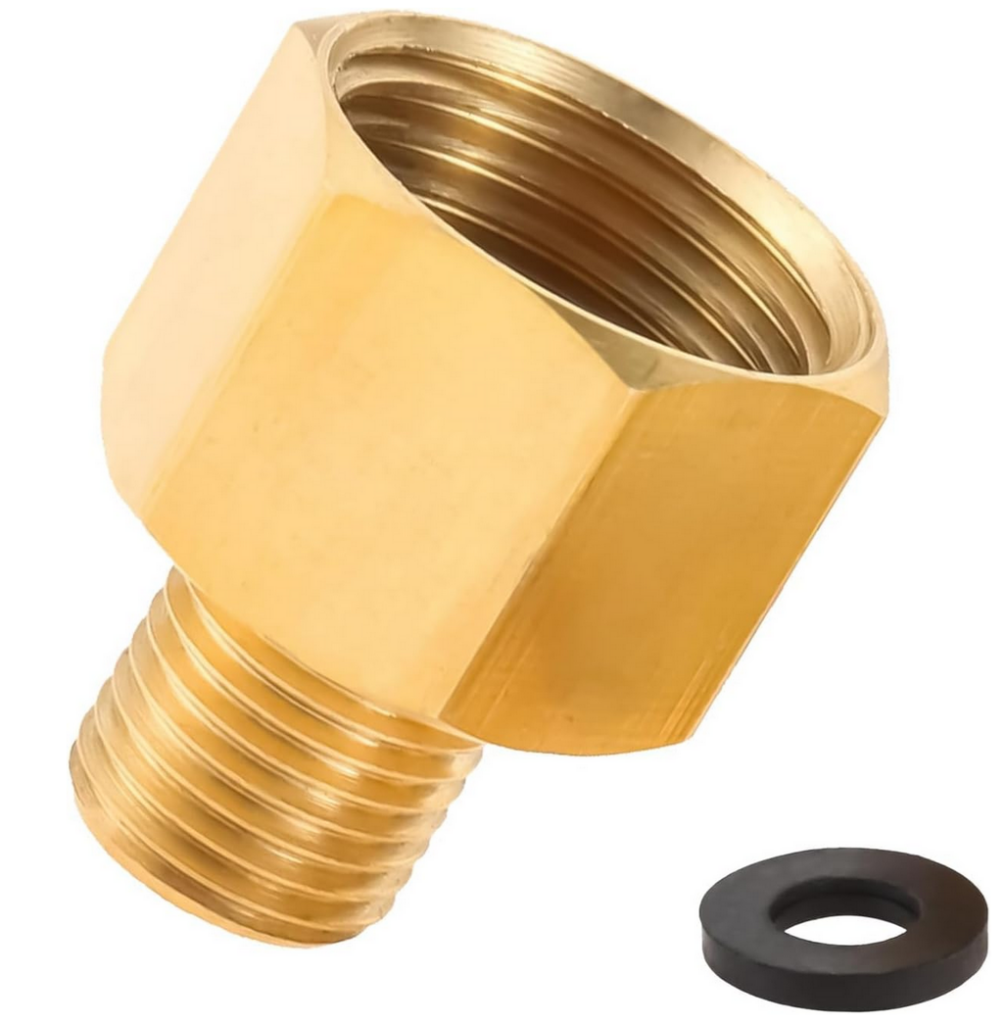
And of course there is no problem to find a blanking plug for 1/2 BSP. Here is the complete contraption, blanking off the existing gas line:
Power
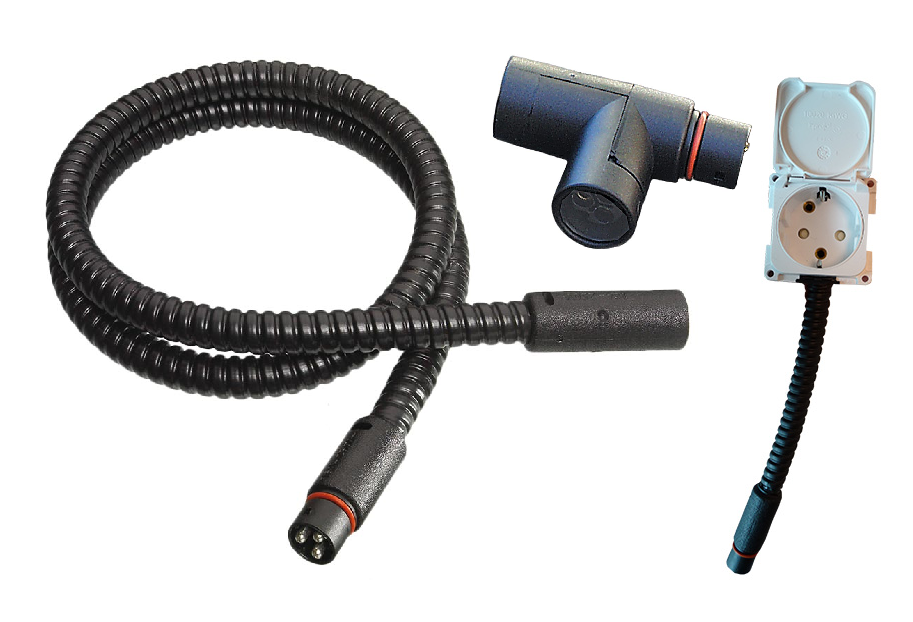
For power there was an extension connection behind the TV lift. The boat uses the Defa “Plugin” system for 230V, so all that is needed are T piece, extension cable, and an outlet:
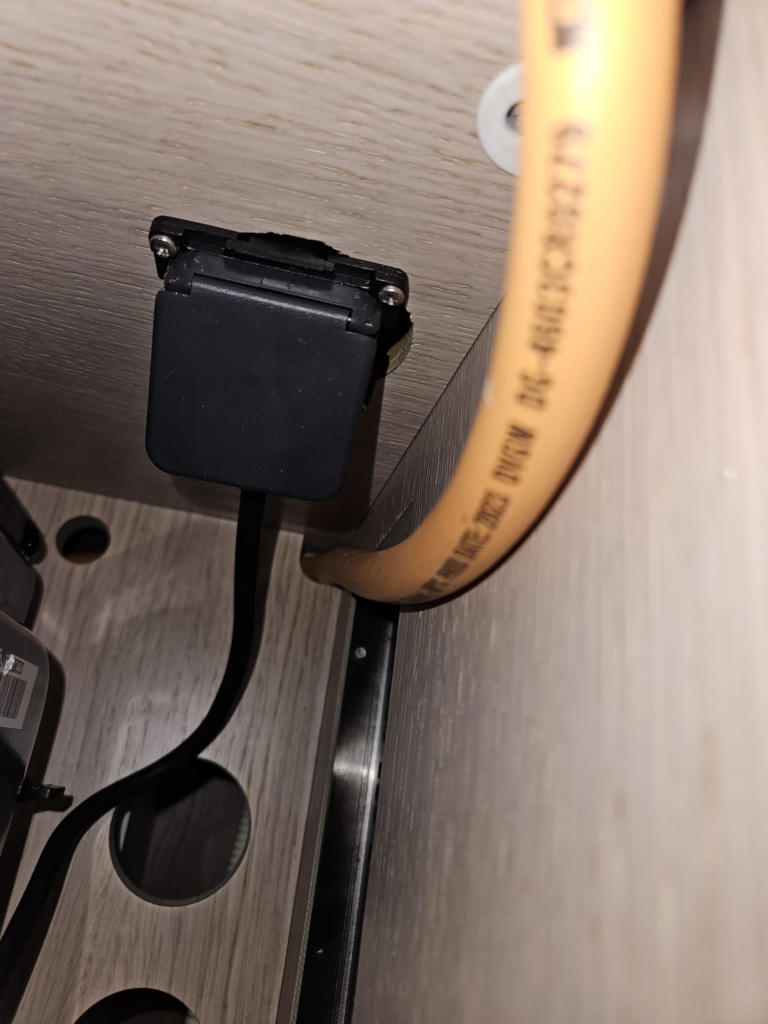
Here is the outlet in place inside the cupboard, you need at least a 56mm hole saw:
Choosing the microwave
I had a few criteria for the microwave:
- It should make decent use of the available room, so not a tiny one.
- It should be at least somewhat possible to adhere to the manufacturer’s recommendations regarding free space above and to the rear of the microwave
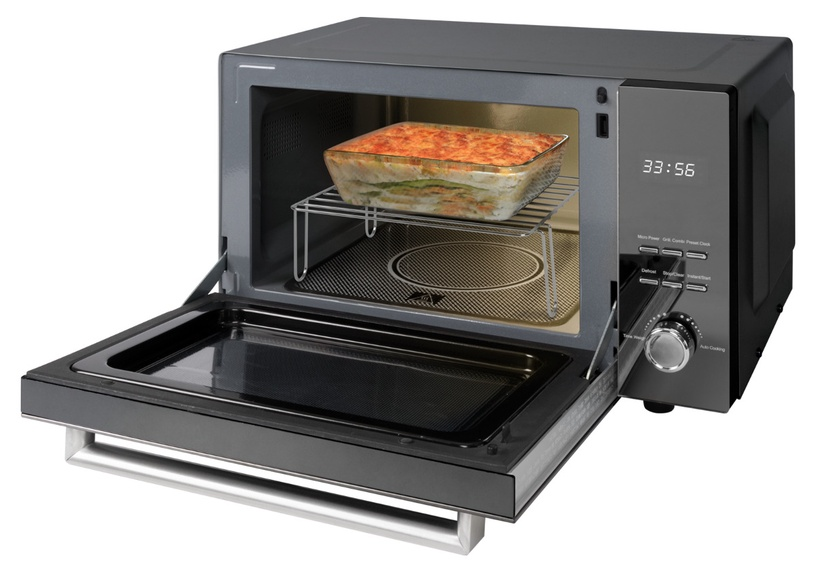
- The microwave should be a flatbed type, because if it has glass spinning in the middle, that has the potential to break in bad conditions. A flatbed microwave uses a motor to spin a reflector at the bottom and thus spins the microwaves instead of spinning the food.
- It should preferrably open down, not to the side, as the space is quite narrow and it is more comfortable to use.
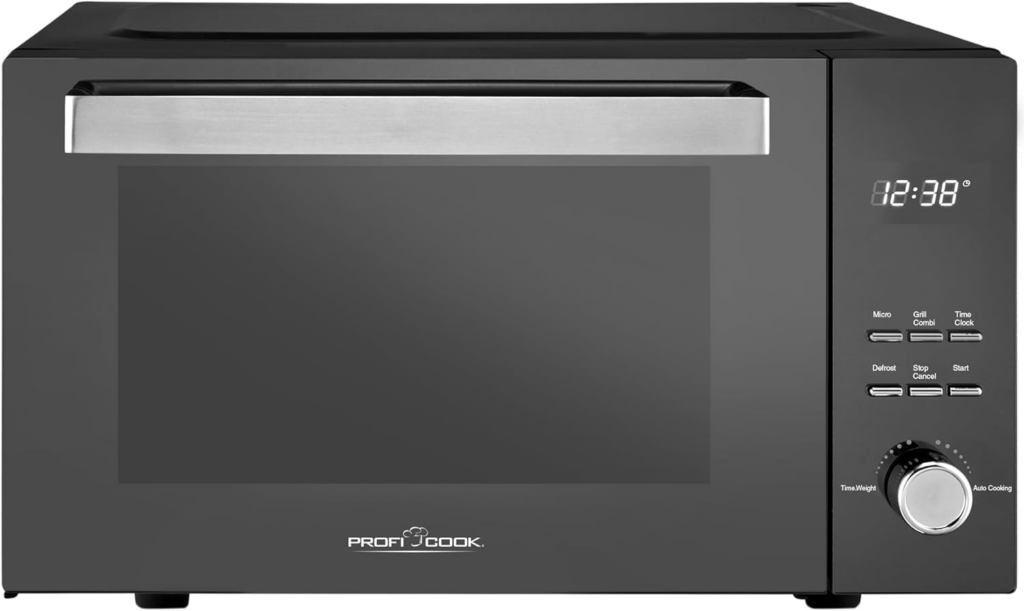
After scouring Amazon for ages, I arrived at the Proficook PC-MWG 1204 – a flatbed microwave that opens on the horizontal axis and has a ceramic grill inside. Proficook is a German brand, but the manufacturing is in China. We shall see how it holds up:
Mounting
The microwave has plastic feet that are clipped into the body with a clip that has a dowel in the middle to fix it in place. I took off the feet, cut off the mounting, took the bottom plate of the microwave off and instead fit 6mm bolts that I threaded inside the feet. After that all that needed to be done is drill some holes and fit a washer with a nut and some Loctite at the bottom:
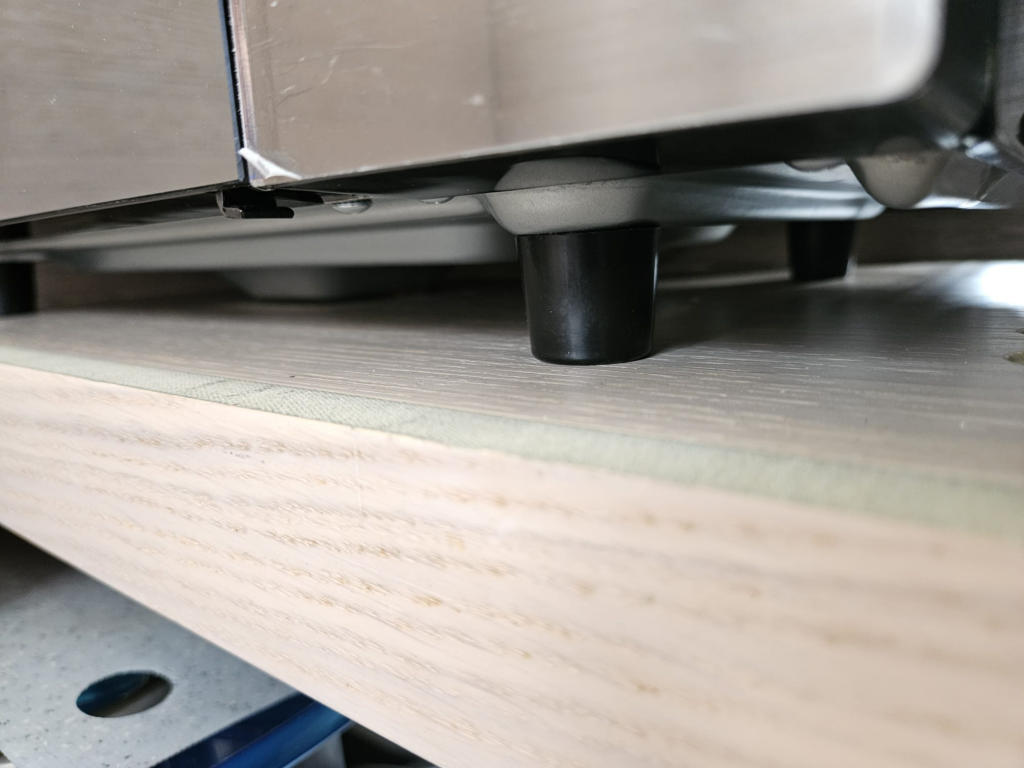
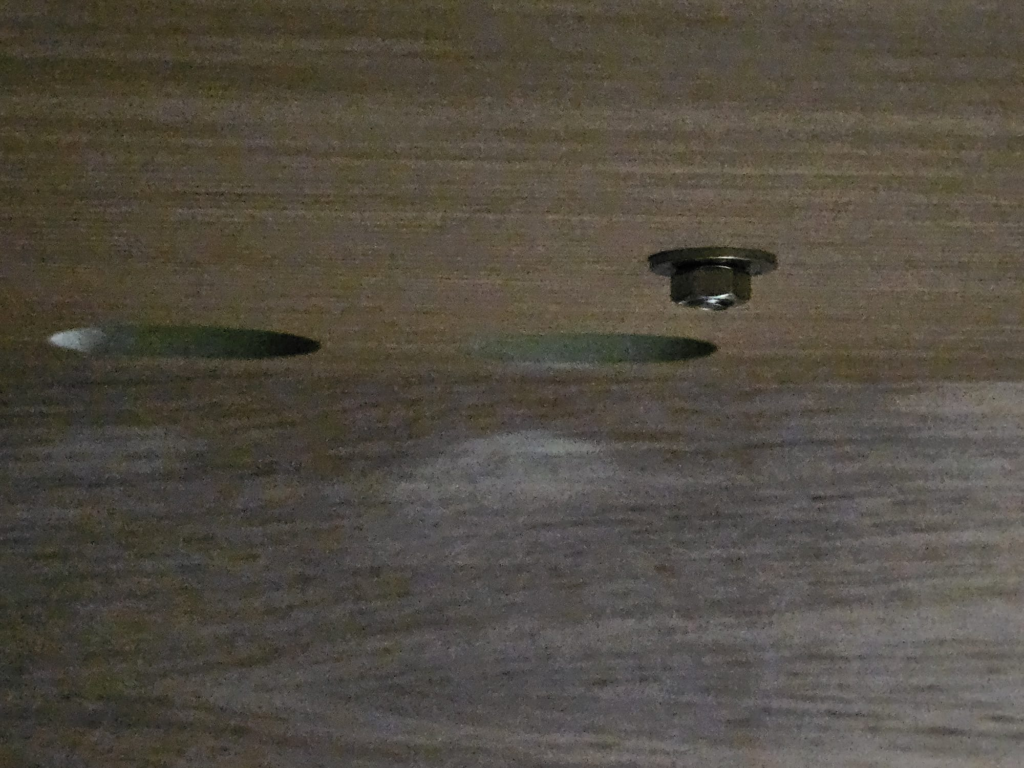
With these fittings in place the microwave was very firmly bolted in place and it does not move at all. It also helps that the magnetron of the microwave, which has the vast majority of the weight, is bolted to the bottom plate. Thus the microwave is mounted very rigidly:
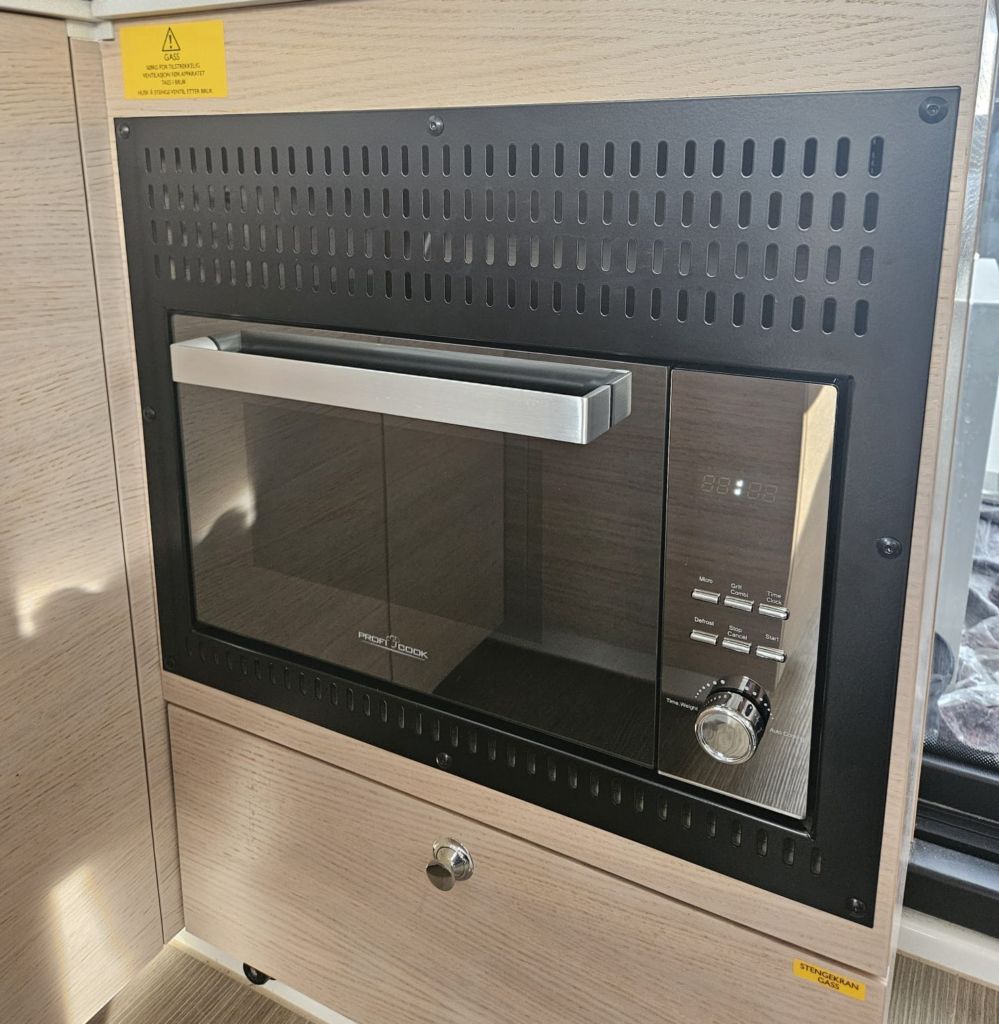
Making the trim
Now I just had to make it look pretty. For that I made a grille in CAD in a similar style as the original oven:
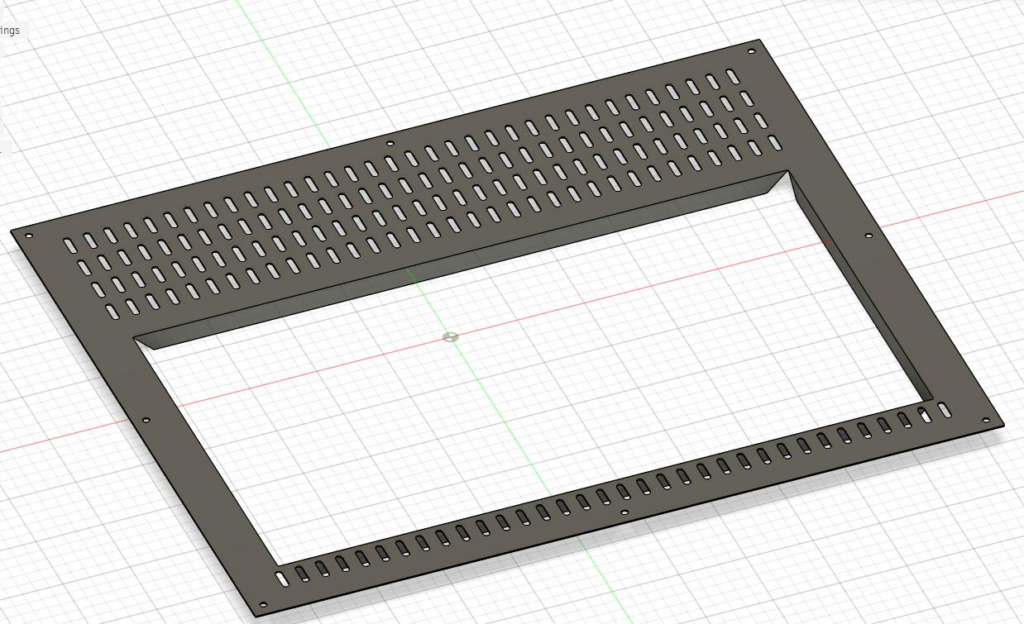
Then the part was ordered from a laser cutting/bending company who also powdercoated it for me. I chose 1mm Aisi304 as the material, for the powdercoat – grainy matte RAL 9005 – jet black.
Managed to find some nice decorative Aisi304 wood screws as well, and here is the final result:
Lessons learned
When I was designing the trim kit I left a 5mm gap at the sides/top and 10mm at the bottom. In hindsight I should have left more. 7-8, maybe even 10mm. Of course it looks better when it fits super tight, but I had quite the job fitting the trim with thickness gauges to make sure that the door actually opens properly. There are also around 1mm tolerances on the edges for the bending machine. When opening the microwave I have ~2mm clearance for the door in the closest position. This is a bit closer than I’d have liked – will see how it holds up, the boat isn’t exactly stationary.
Another point about the trim kit – I would use maybe 1.2mm or 1.5mm sheet next time. While there is no flex due to the bent parts, I did have to use some tape in between the screws to take up a miniscule amount of play that when tapped produced a rattling sound. The 1mm does look really nice though.