What’s wrong with it?
First of all the physical dimensions. The factory fits 2x70W solar panels, which cover a little more than half of the available space:

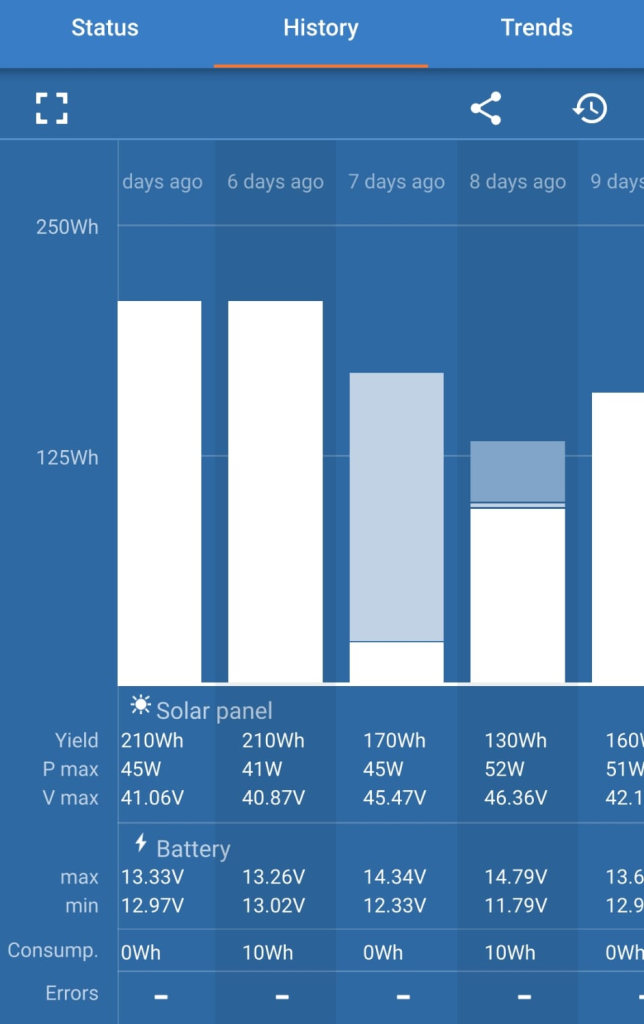
Then comes the electrical part. The panels are for some reason connected in series. One of the panels is always partly shaded by the radar mast and this limits the second panel always to that output and no more. As a result the most I ever saw from the panels was around 75W. A typical graph looks more like this:
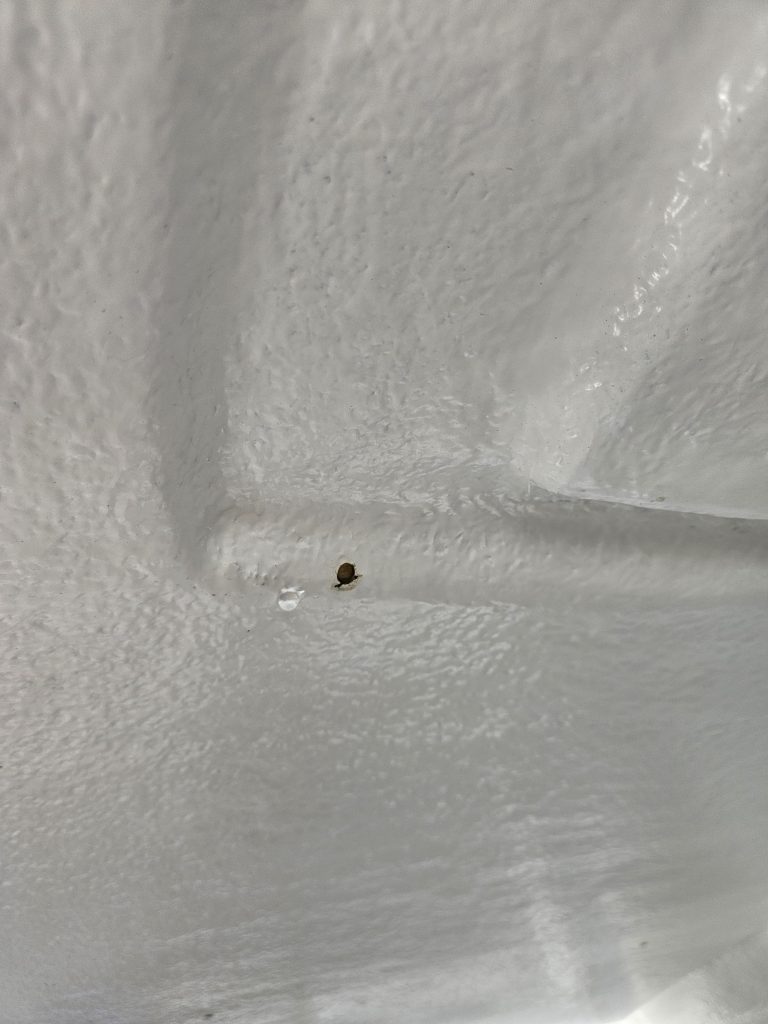
Finally comes the appalling installation. The panels are only bolted in place, so there is a lot of water accumulating under the panels at all times. What is much worse though, is that the arch with the panels and radar is made from two pieces of GRP with a cavity in between them. Because the factory used no sealant at all on the bolts, that cavity and all the GRP inside was filled with water, that started seeping out slowly:
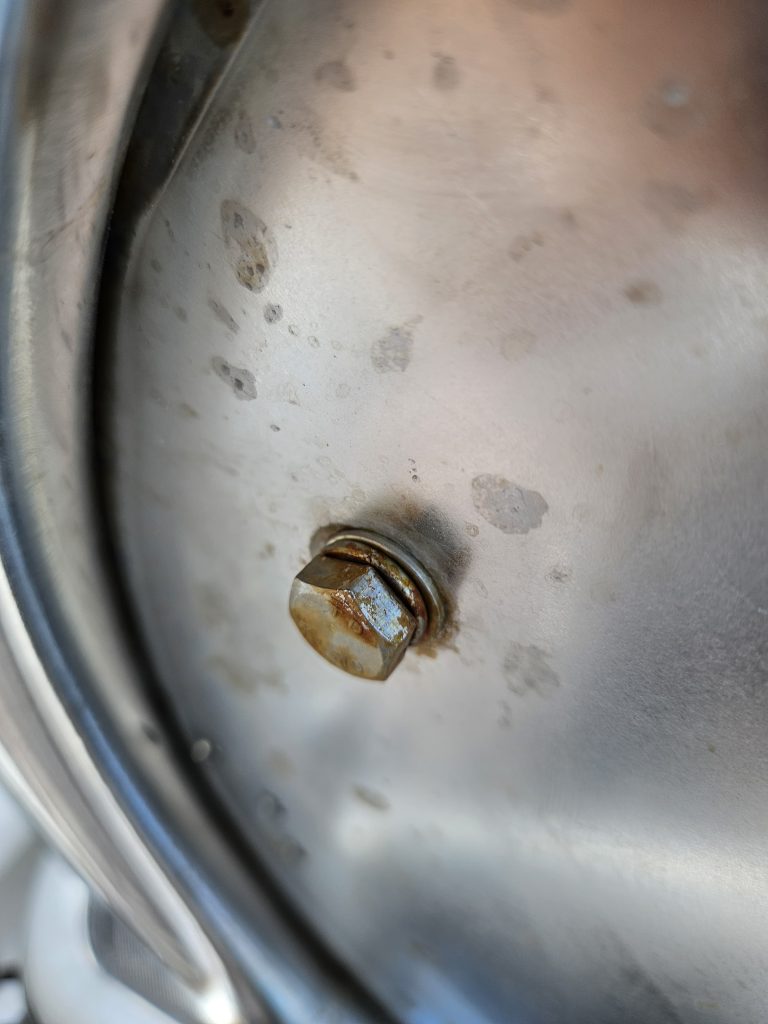
Finally, while I was working there, I noticed that there is a lot of rust on the bottom of the radar mast. The rust has been coming from the locking spring washers that the radar is bolted to the mast with, they are not stainless steel:
After my analysis I can say that the solar installation from the factory is there to just check a box – “boat has solar”. In reality it produces almost no usable power. Usually under 30 watts. Using just two Y connectors the power output can doubled with the original panels, but I went further. The installation quality is very bad at best and a disaster waiting to happen at worst – GRP does not like to be wet inbetween layers.
Shopping List
The main objective was to find larger, higher quality panels with more bypass diodes. The original panels are made by Farco and they are 940x415mm.
After a long search I found some 115W ETFE panels by Ultimatron (known for their Lithium batteries), that measure 930x670mm:

To solve the issue with the shading you just need a kit of MC4 Y connectors:
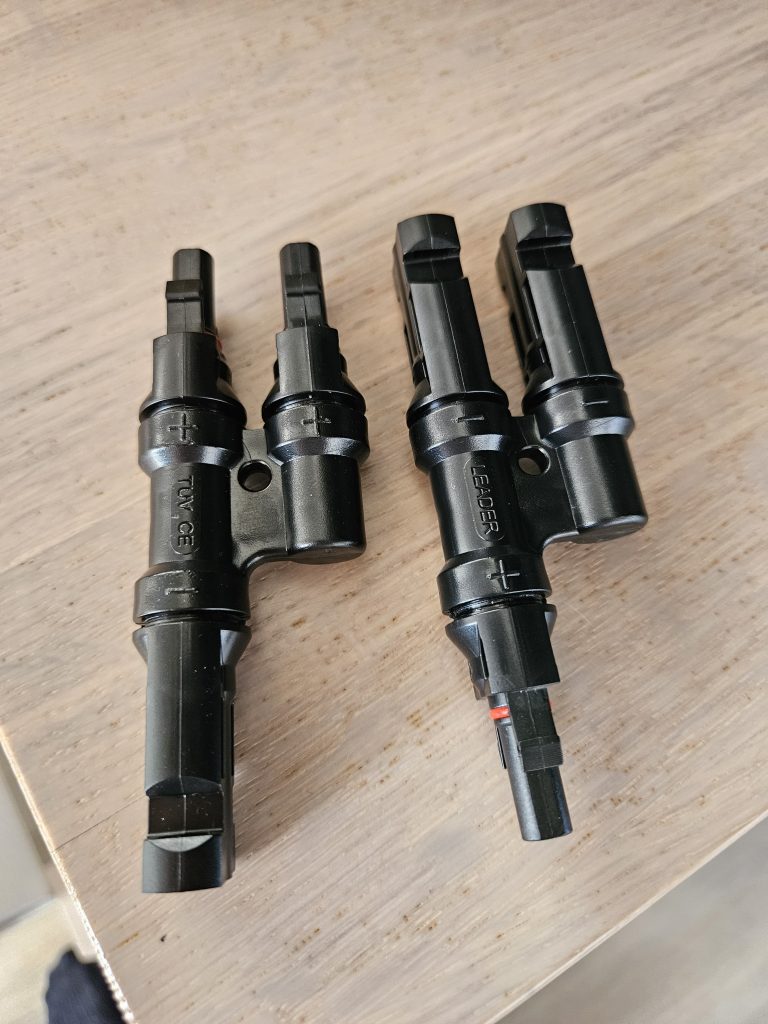
This is plug and play, you simply unplug the existing panels, connect the Y connectors and plug in the connectors of both panels into the Y connectors. After that the shaded panel does not affect the unshaded one at all any more.
Installation
The first thing that has to be done is the radar arch lifted out of the way and towards the rear (it is quite heavy, need two people). It’s held in with some siliconed screws on each side – surprisingly sealant was used here, unlike on the solar install:
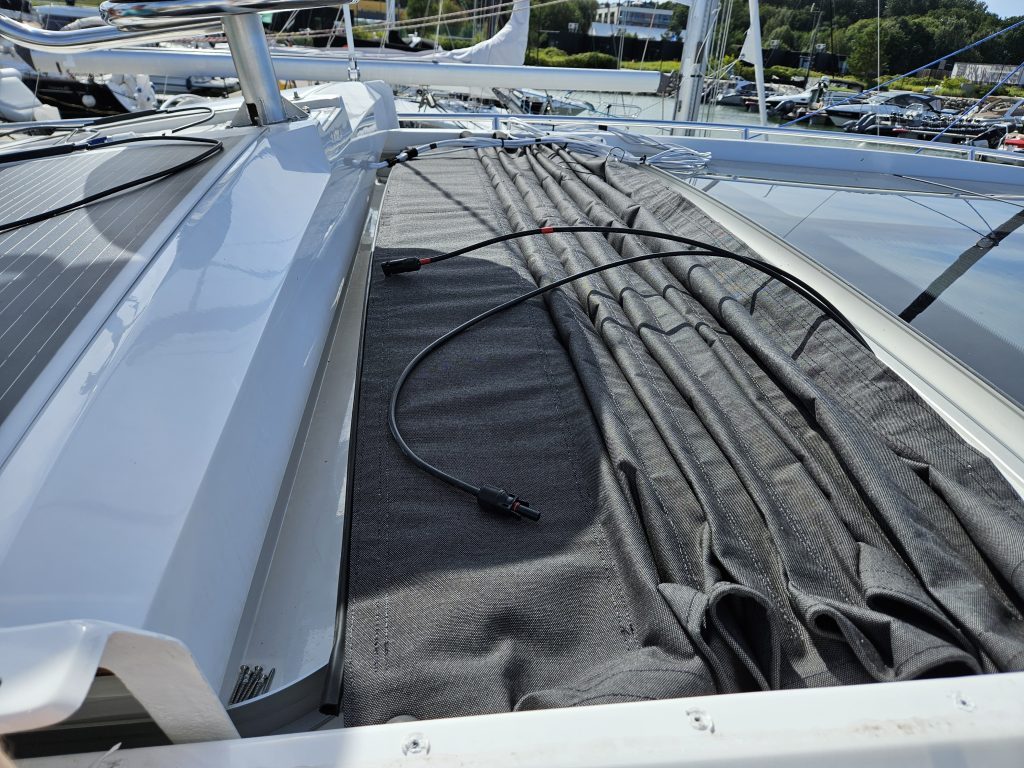
You can also see the MC4 connectors already unplugged in the top photo and the new panels test fitted. In my case one of the connectors was fitted badly from factory – the raw wire was exposed behind the connector. I needed to undo the connector and use some insulating tape, so that water stops getting in there (it was getting a little green/oxidized).
You then unbolt the panels and fill the existing holes with sealant from the top. From the bottom they should not be filled, so that the water that has accumulated in the arch and in the GRP layers can come out/dry out eventually.
New holes need to be drilled after that, and finally to prevent more water ingress and prevent the panels from getting wet underneath, I decided to seal all around the bottom of the panel as a square (and sealed the new holes of course).
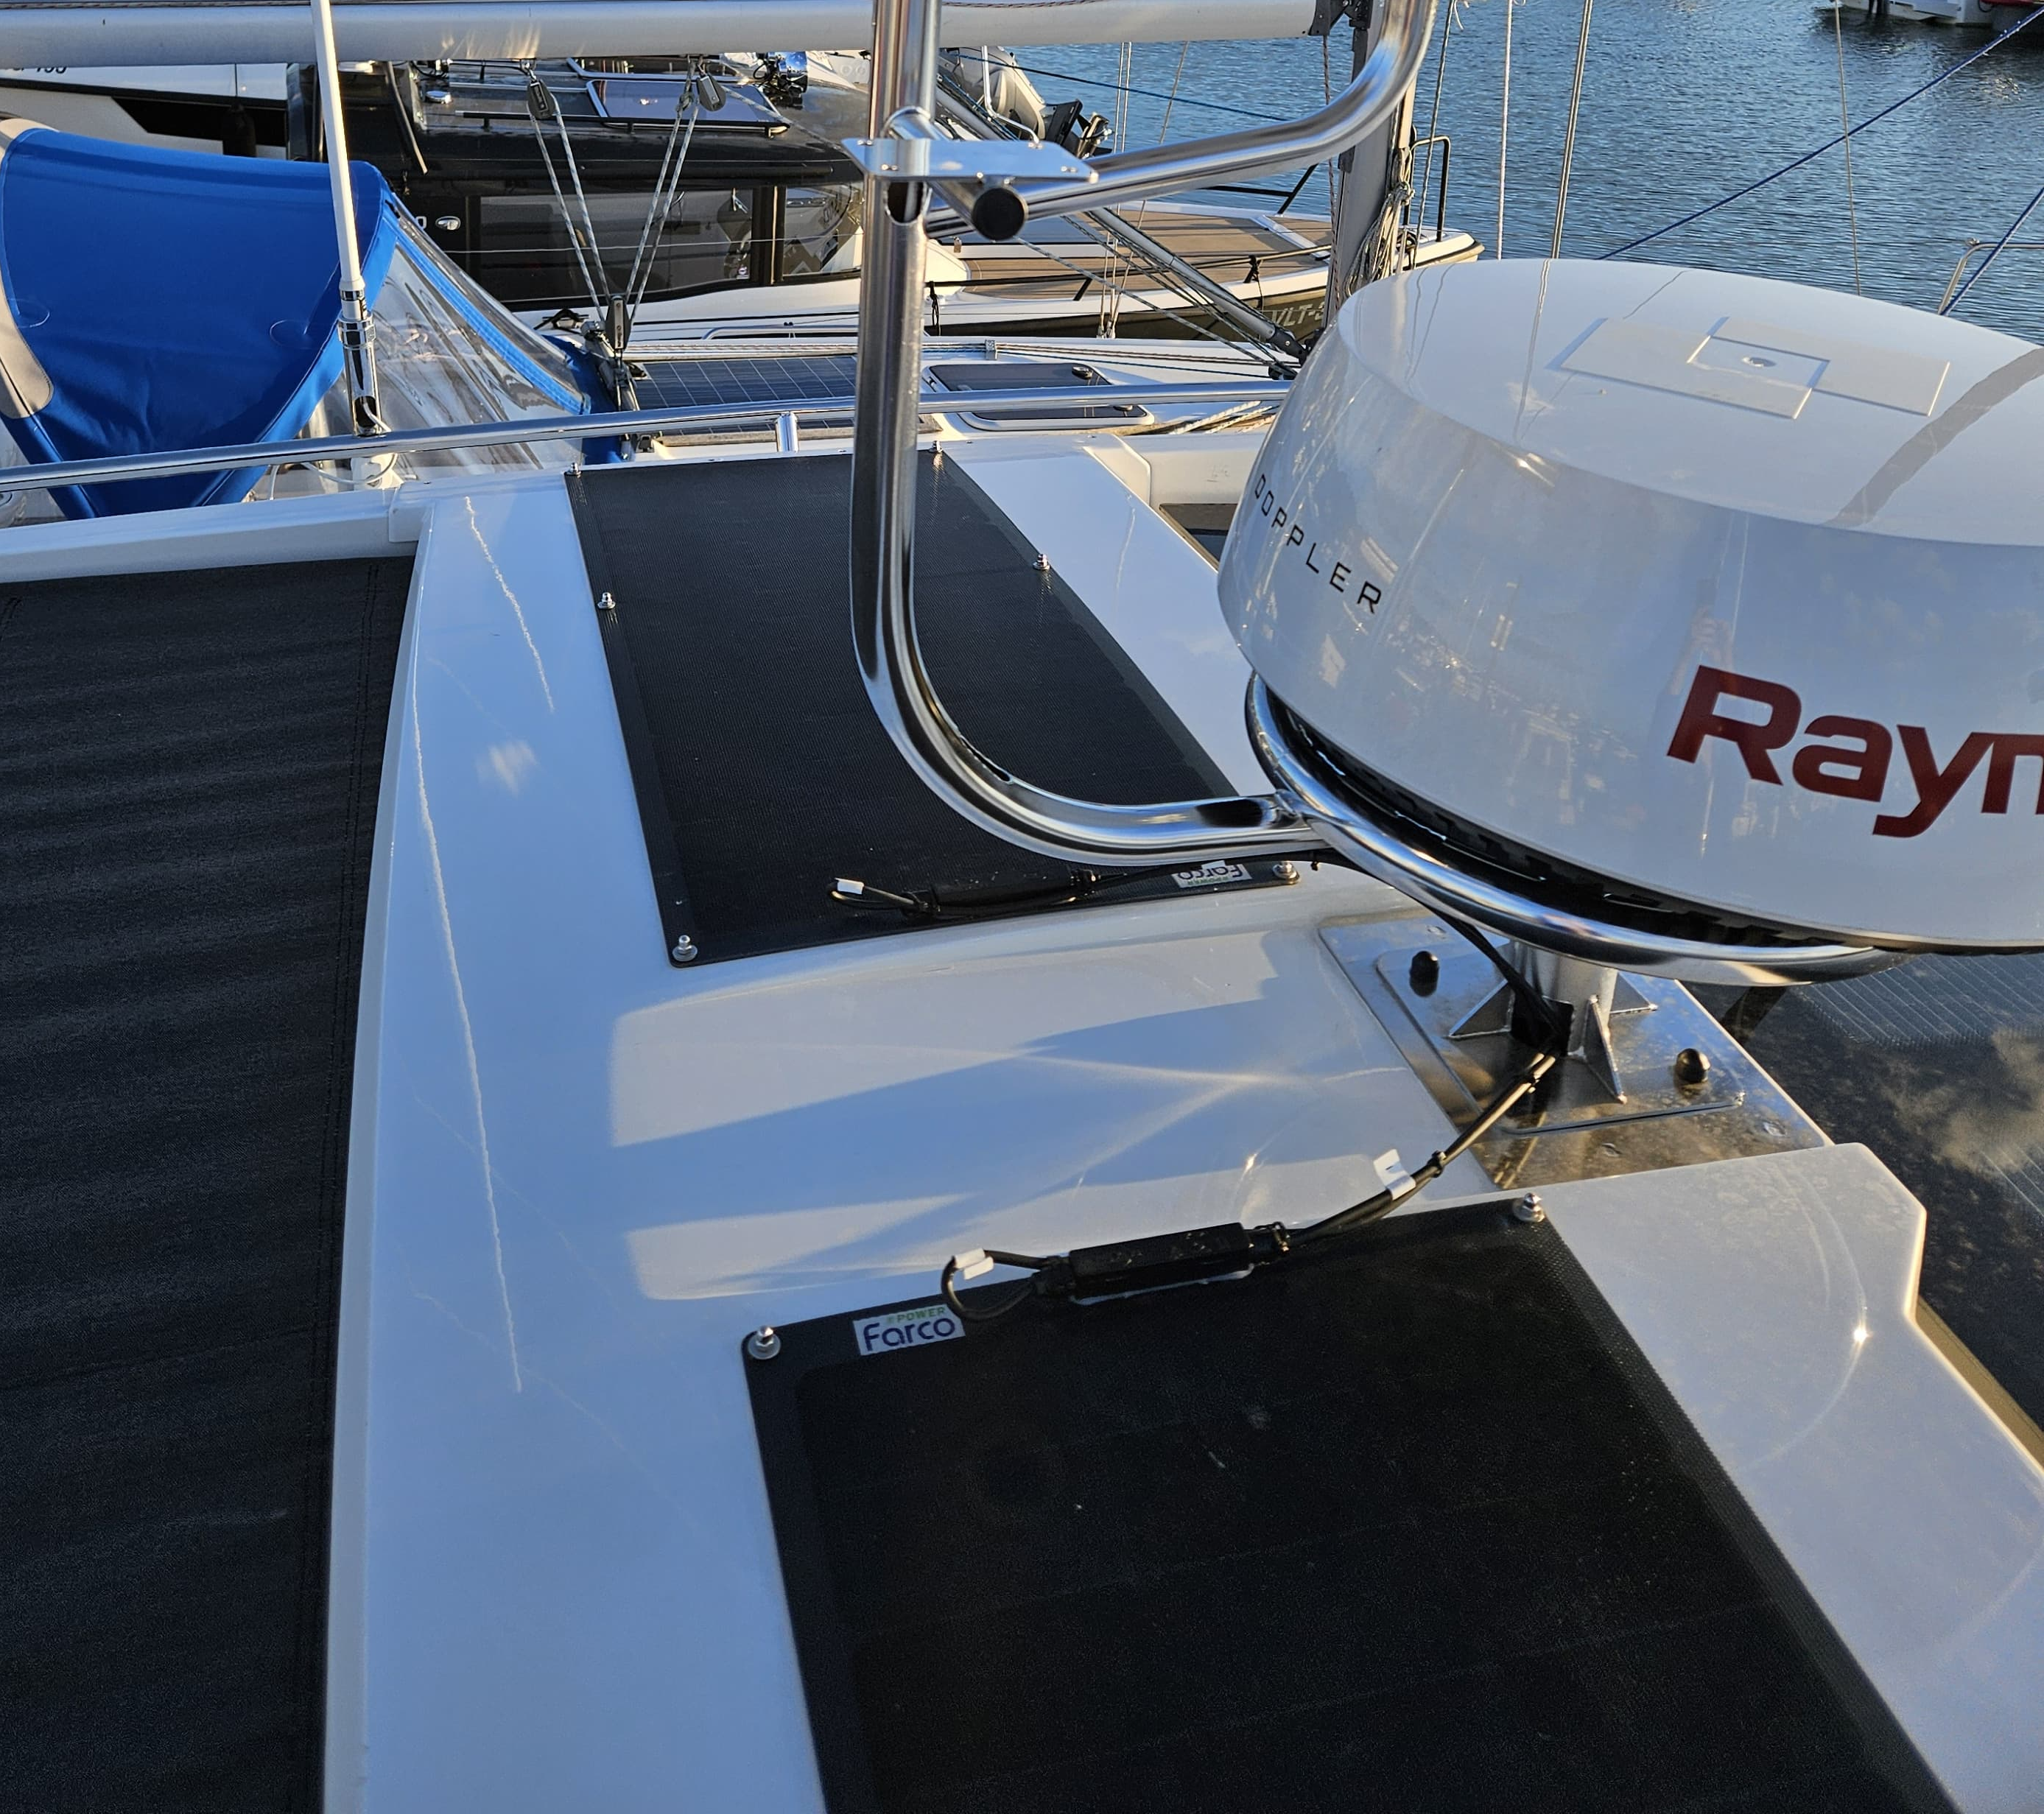
The final installation looks like this:
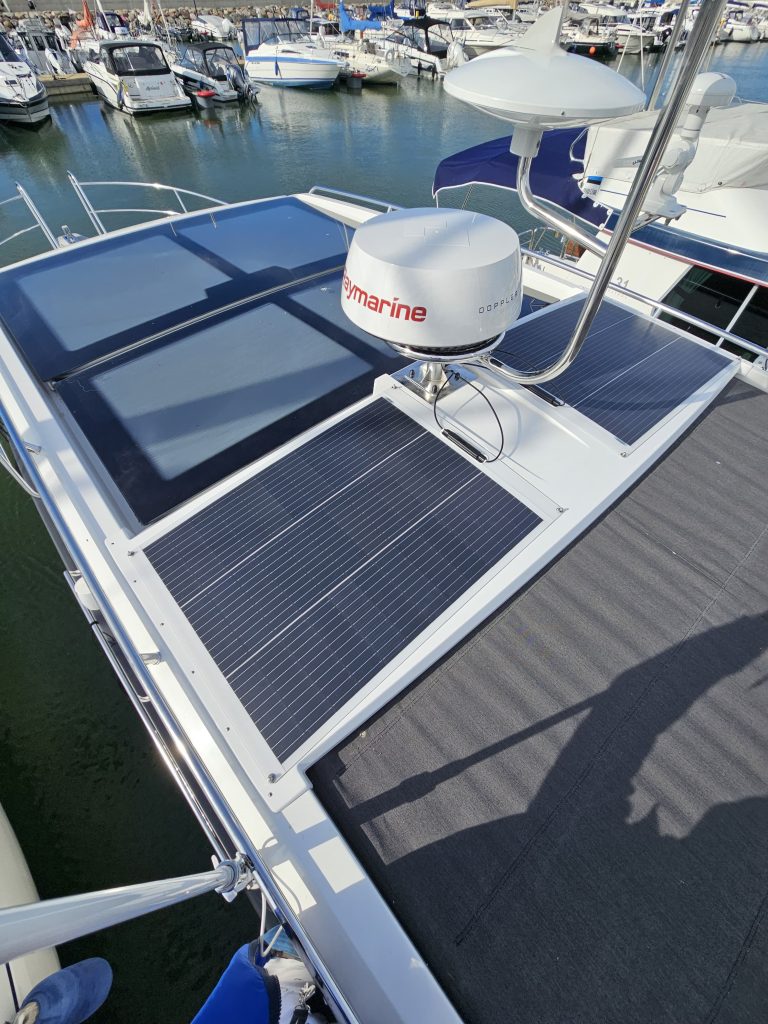
Now all the space is used optimally, and does not look pathetic with the two thin panels in the middle 🙂
The Result
During the first test in the afternoon with one panel partially shaded the panels produced 150W. This is at least three times as much as it was producing before. I am sure in more optimal conditions it will be possible to hit 180W. The factory fitted Victron MPPT controller is capable of supplying up to 195W to the battery at 13V.
I also solved the issue of water getting in between the layers of the radar arch as well as the radar mast being rusty at the bottom.
My recommendation would be not to choose this option from factory, or ask them to just install the MPPT and the wires, but not the actual panels. Or if the factory is reading this – these panels cost 70 EUR+VAT each, the Y connector set is 5 EUR+VAT for the two, and a little extra silicone costs a few cents. Please fix it already at the factory.