Introduction
I did not want to rely purely on 4G (or 5G) internet – in some of the archipelagos and islands around here the cell coverage is not great and certainly not good enough for work. Because a good friend of mine had a terminal left over that I could have for free I decided to mount it on the boat.
The dedicated maritime plan is super expensive, but the roaming RV plan works up to 6nm from any land, so if you are on smaller islands you can still have fast internet. Also, if you need the maritime reception (works everywhere), you can buy some “priority data” at any time, but you have to pay per GB. The RV plan in Estonia is 59 EUR / month at the moment, and you can pause it at any time.
Hardware
The Starlink kit consists of a phased antenna array dish (“Dishy”), a router and a 220V cable. The dish runs on a certain type of PoE, which is 48V DC. The router converts 220V AC to 48V DC for the dish.
Doing this on a boat is very inefficient. You have to first convert the 12V from the battery using an inverter to 220V, then convert it back down to 48V DC. This makes the maximum consumption of the dish around 120 watts and the average consumption closer to 60 watts.
The dish acts as an Ethernet bridge, and you get an IP via DHCP from it. The Starlink router is thus only needed to create the WiFi and to convert 220 AC to 48V DC. In fact you can use any router you like, and then a capable injector to inject 48V into the correct twisted pairs on the cable. Lowering the average consumption to 20-30W.
Shopping list
Here’s the major stuff you will need (not mentioned are electrical press fittings, Wago’s etc):
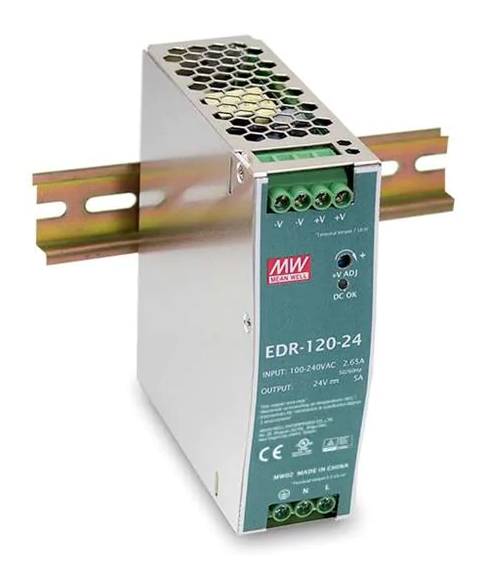
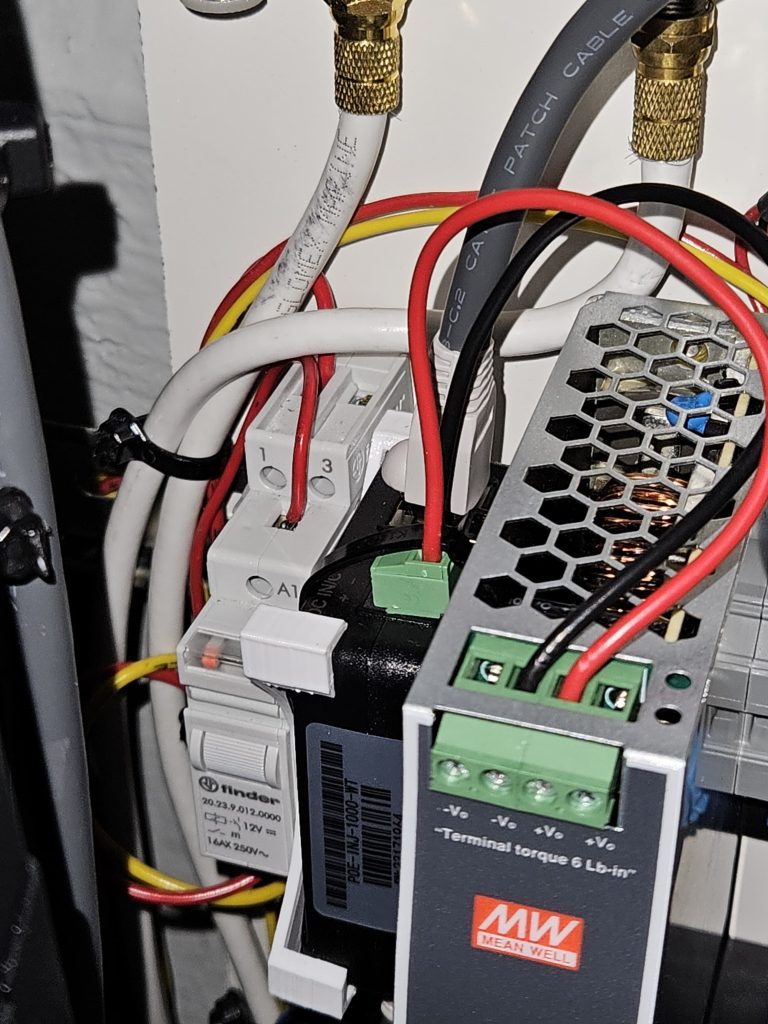
Meanwell 120W 48V DC-DC converter EDR-120-48
https://eu.mouser.com/ProductDetail/MEAN-WELL/EDR-120-48
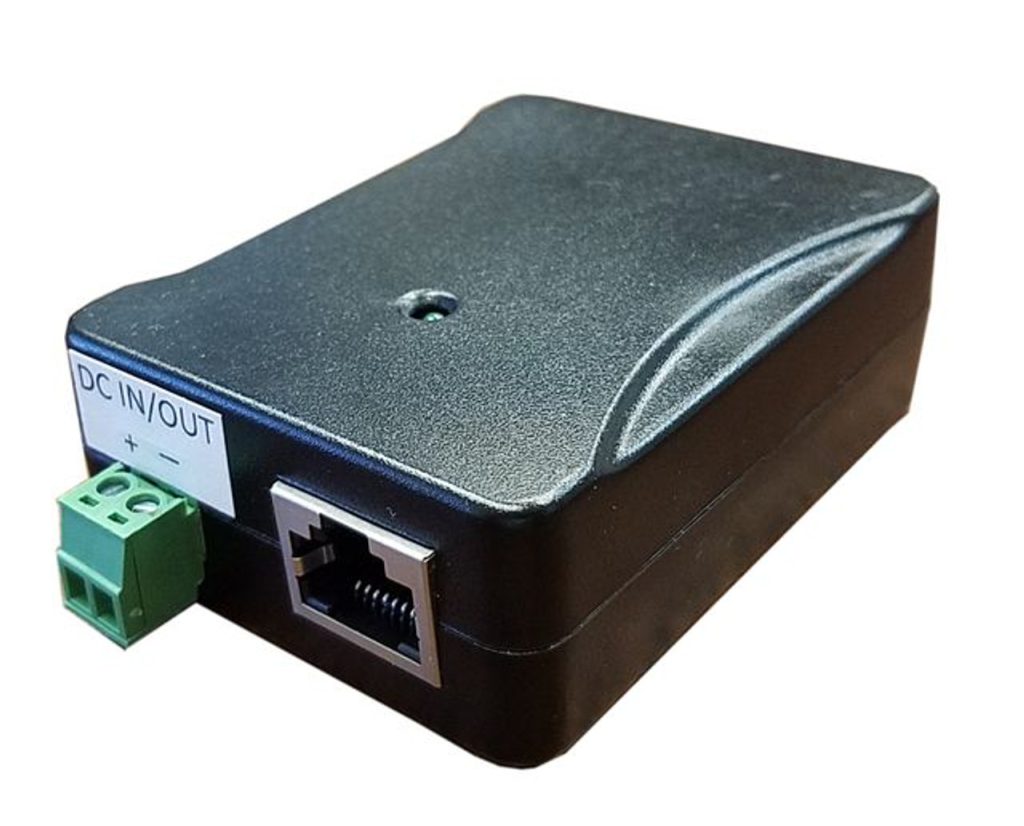
Tycon System PoE-INJ-1000-WT
https://www.wifishop.cz/tycon-system-poe-inj-1000-wts-gigabit-hp-poe-injector-splitter_d60377.html
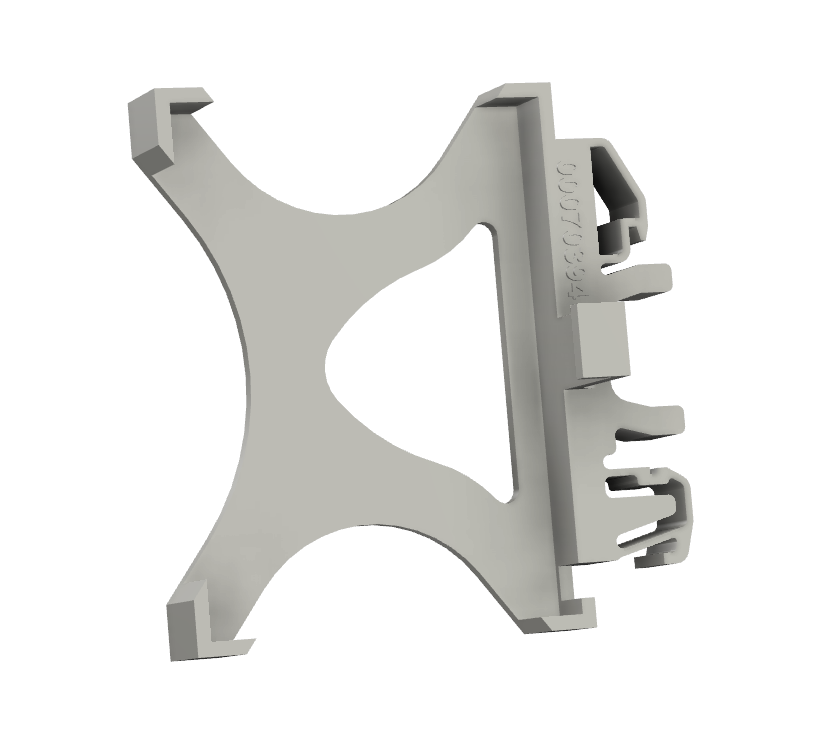
DIN Rail holder for injector:
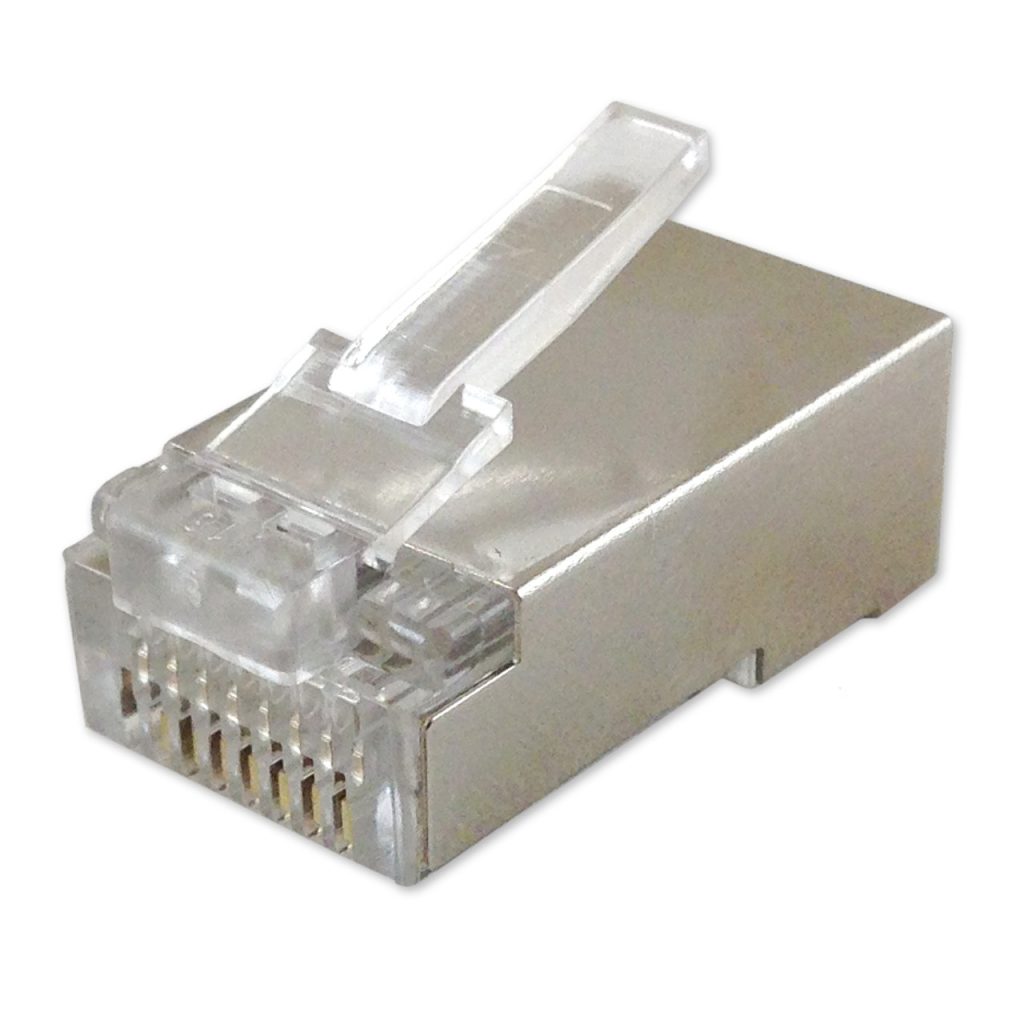
RJ45 shielded connectors (get at least 4-5 so you have some spare if you mess it up):
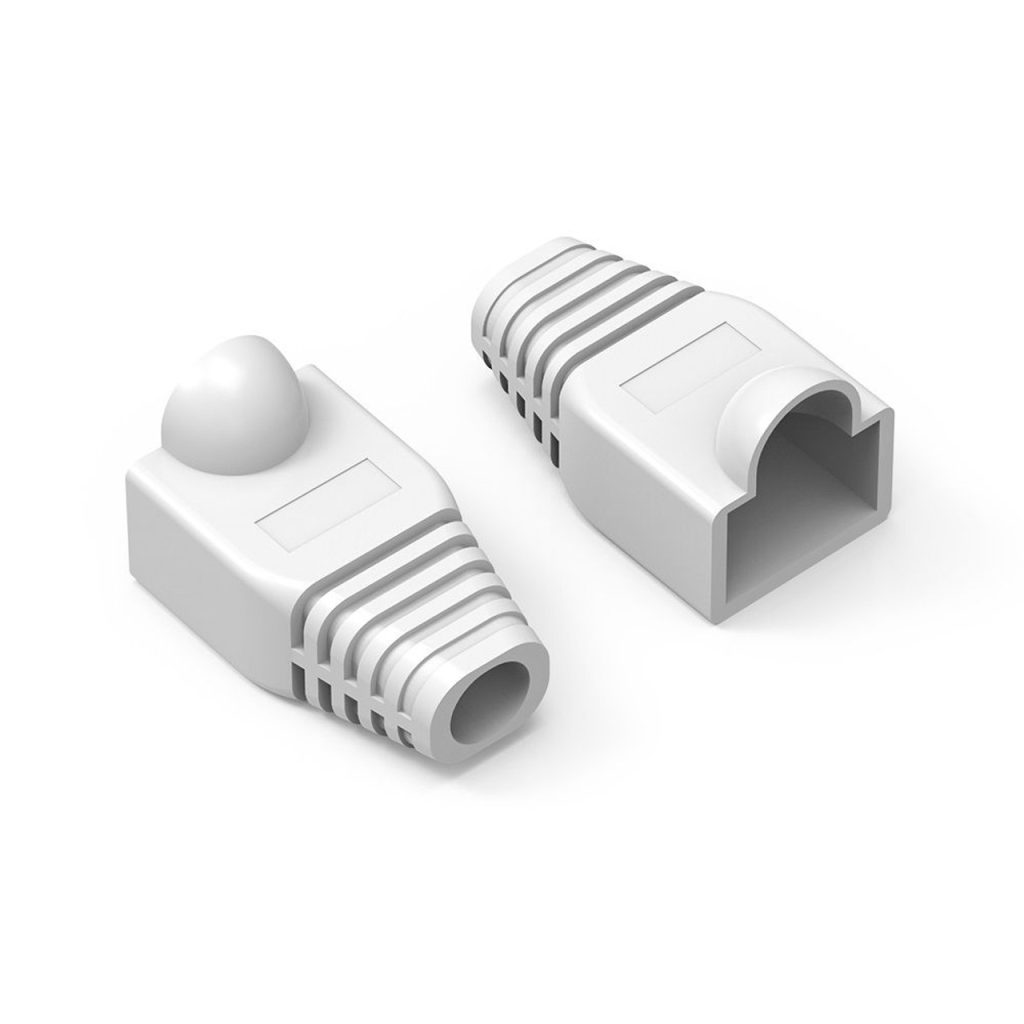
Strain relief for the RJ45 connectors:
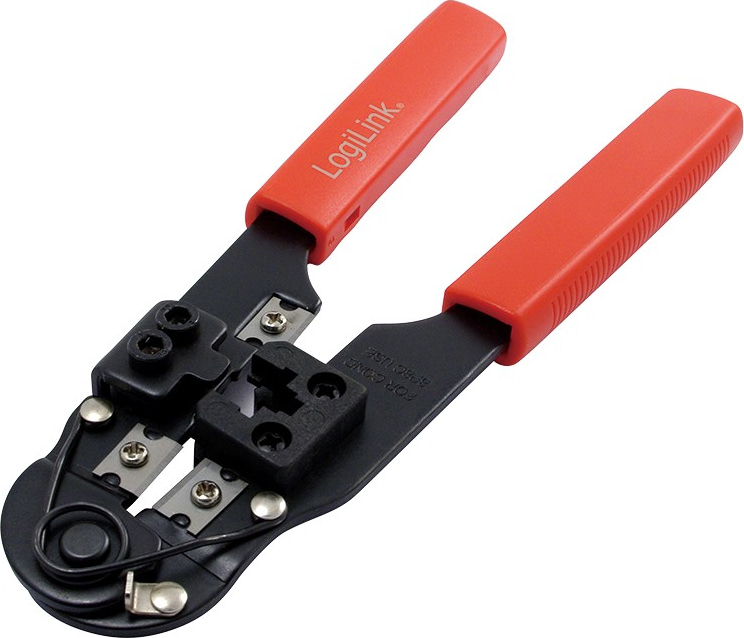
RJ45 Crimping tool:
12V WiFi Router. I used the MicroTik wAP AC
https://mikrotik.com/product/wap_ac
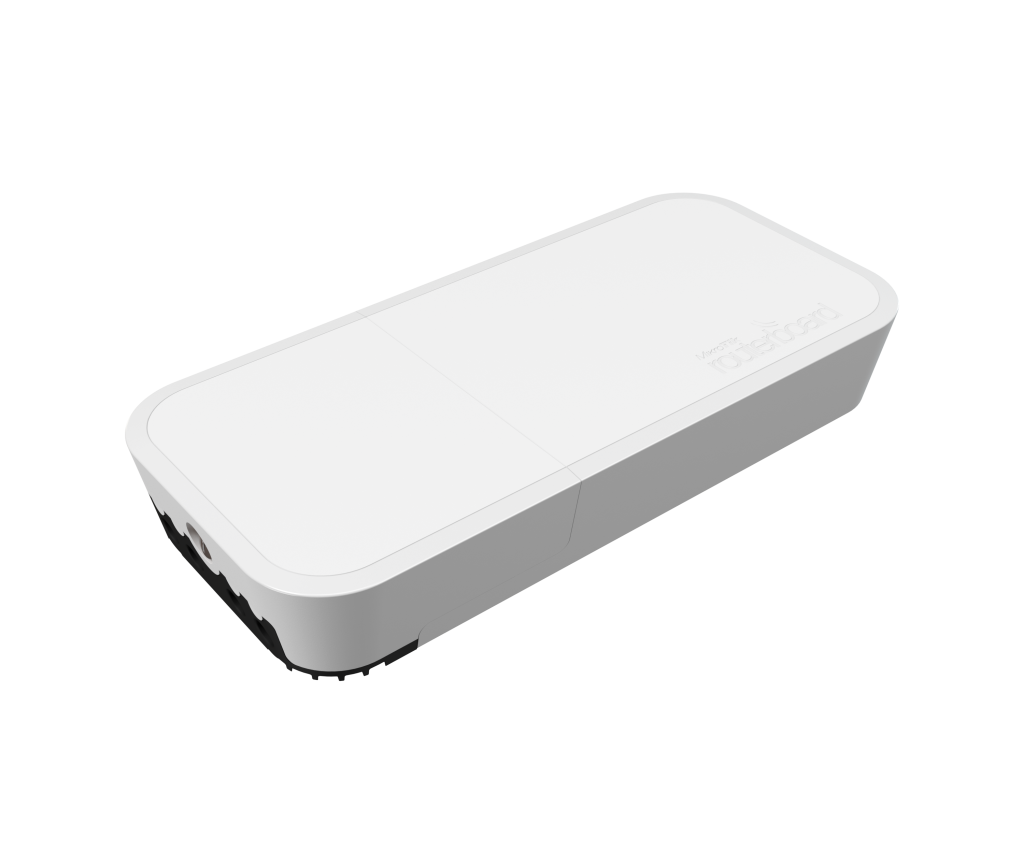
To be honest I am not sure I can recommend it. With default settings the WiFi is very slow and it takes a lot of fiddling to make it work well. I think the Teltonika 12V capable routers are probably better (but also double the price).
Starlink terminal:

I like the Gen2 actuated dish the most because it has the lowest power consumption, has the best mounts and there is no significant speed difference between any of the dishes anyway. But you can also get the Gen3 flat one, just more challenging to mount it.
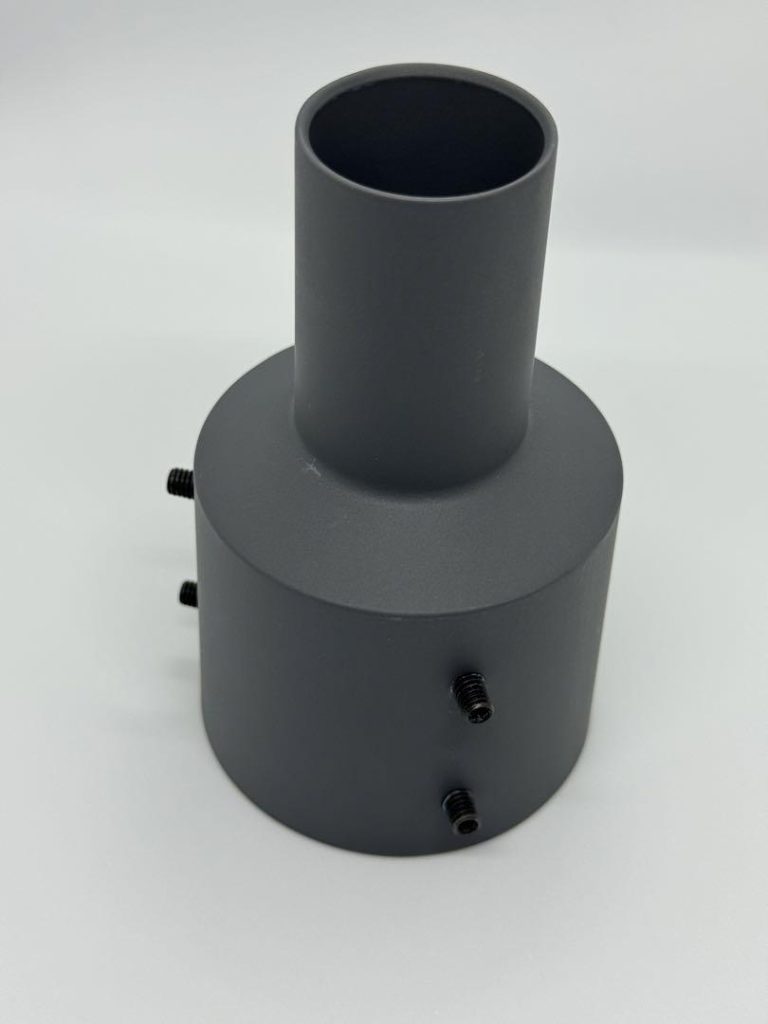
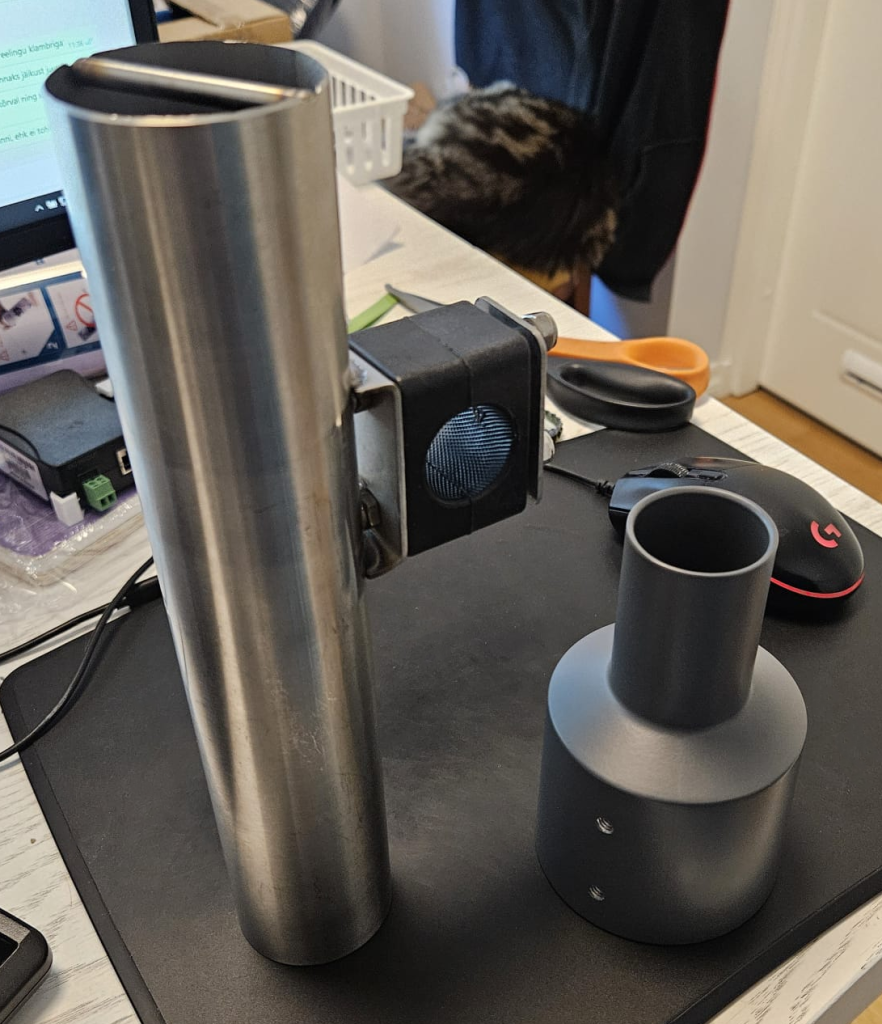
Pipe adapter:
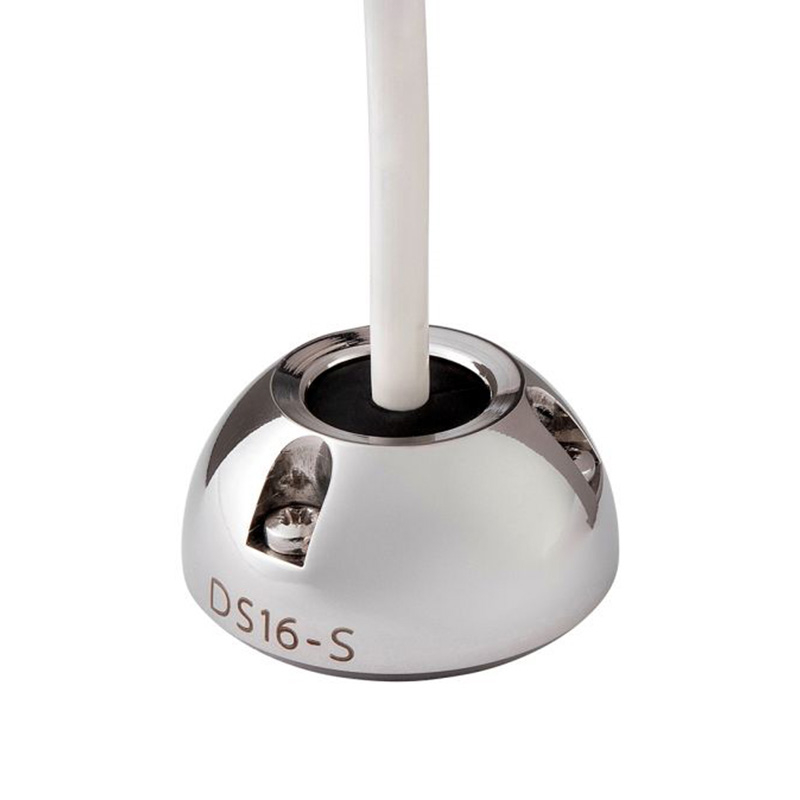
Scanstrut DS16-S cable seal to match the others on the boat:
Preparations
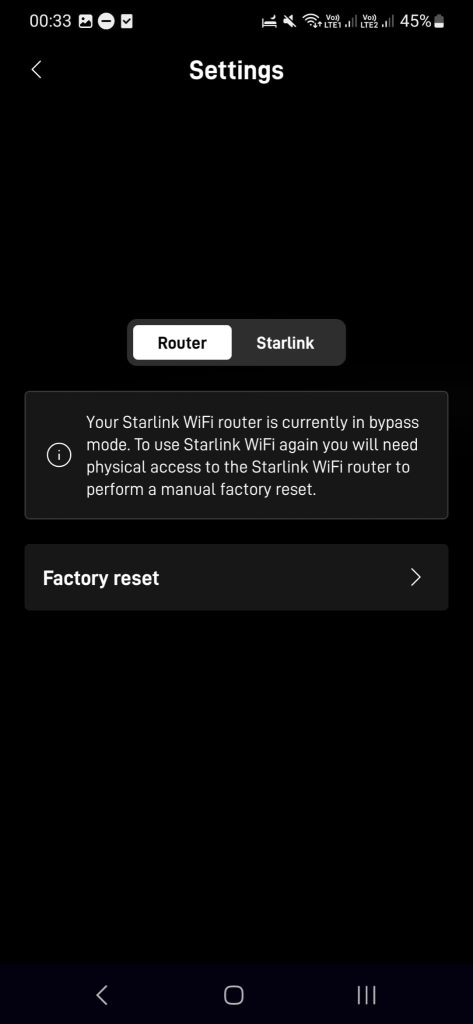
Before you cut any cables, start up the Starlink system with the standard router and verify that everything works. Then set the router into “bypass” mode with the Starlink phone app (Settings -> Router), it should look like this after you are done:
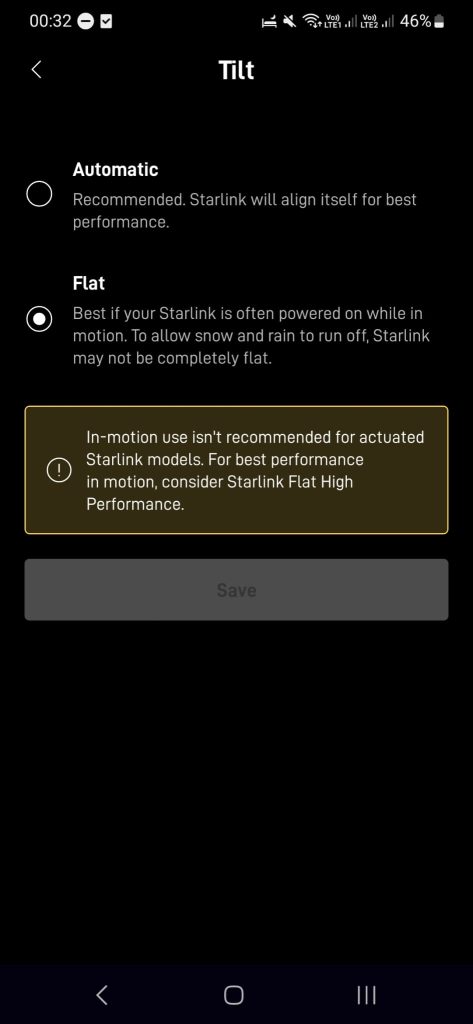
SpaceX recently added a very useful feature, that allows you to stop the dish from actuating (this does not work on boats because the boat is always moving), before that people resorted to drilling:
And finally disable the snow melt mode, because it uses a lot of power and you should never need it on the boat:

Physical mounting
For the physical mount I used a fishing pole holder with some modifications.
I don’t recommend this particular one because while it’s stainless steel, it’s not marine grade, so it is rusting a little. If I were to do it again, I would just use all AISI-316 parts – 2x U-bolts, 4x nyloc nuts, and a piece of pipe.
It’s a good idea to put some milspec heat shrink on the u-bolts to prevent from damaging the chrome finish on the rails. To mount it you drill two holes in the tube for each U bolt (in my case since I used a fishing rod holder I only drilled holes for one U-bolt) and then just bolt it to the aft port corner of the boat (screw on the nuts inside the tube using a ratcheted wrench):
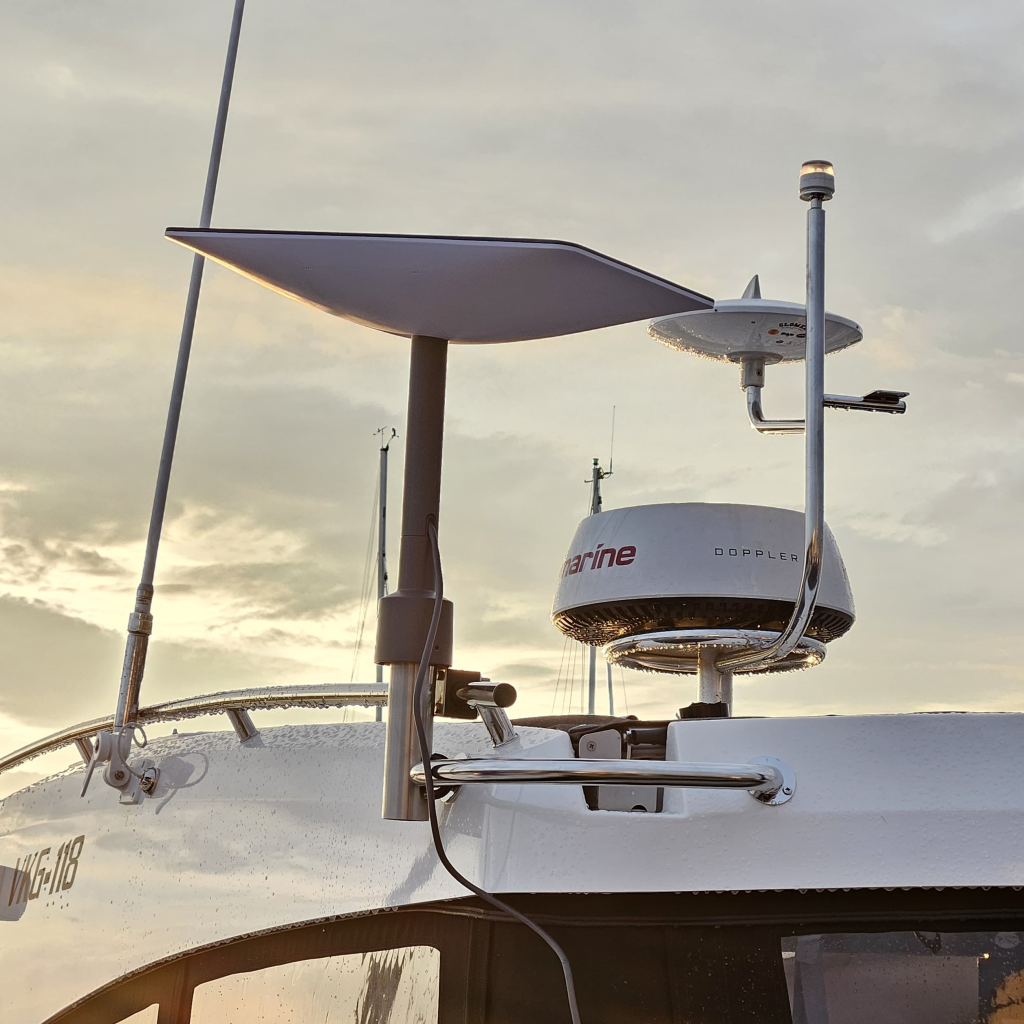
Finally drill a hole in the side of the roof, fit the DS16-S and pass the cable inside to the “technical room” under the saloon seat using a cable puller. It can help to remove the rear speaker.
Electrical connections
First you need to prepare the cables. Some lines have to be swapped before and after the POE injector:
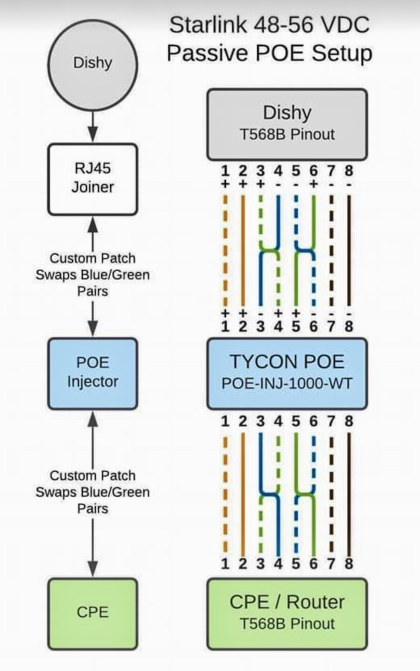
You can cut the cable from the dish to the technical room to size (leave some to spare), and fit the first connector. This goes into the POE injector. Then from the leftover cable you cut a small part that goes between the POE injector and the router and fit the connectors according to the diagram.
The technical room already has a DIN rail for the water pump relay, and this DIN rail can also fit the two new components (48V DC-DC and POE Injector), the router can be fitted on the side:
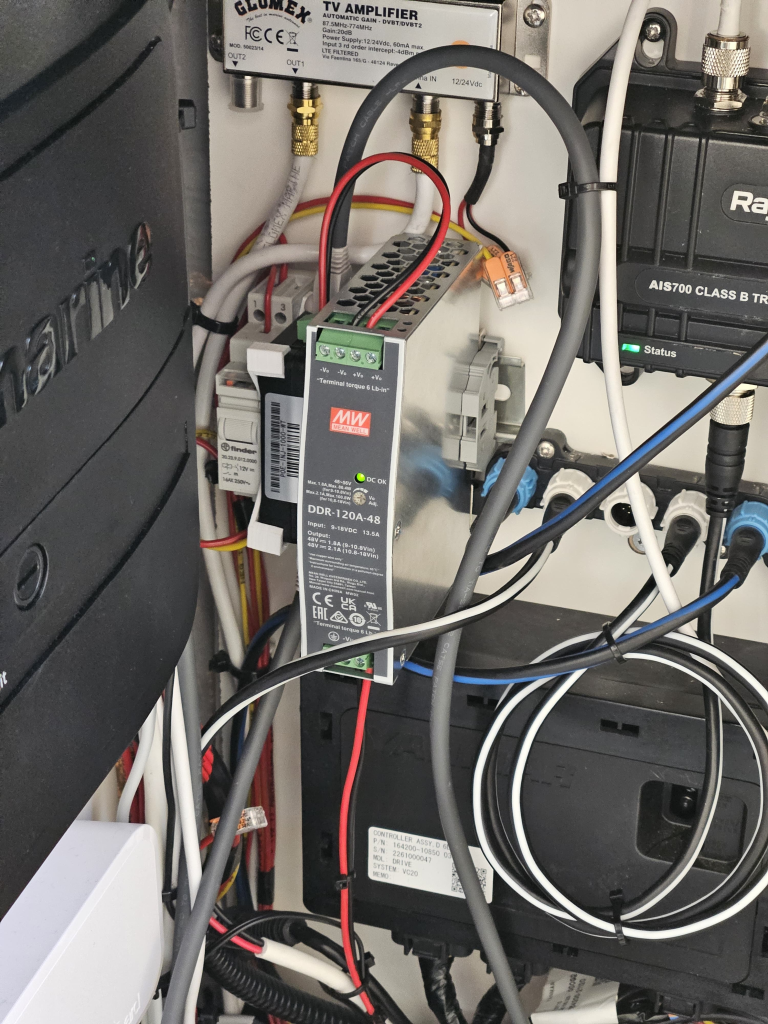
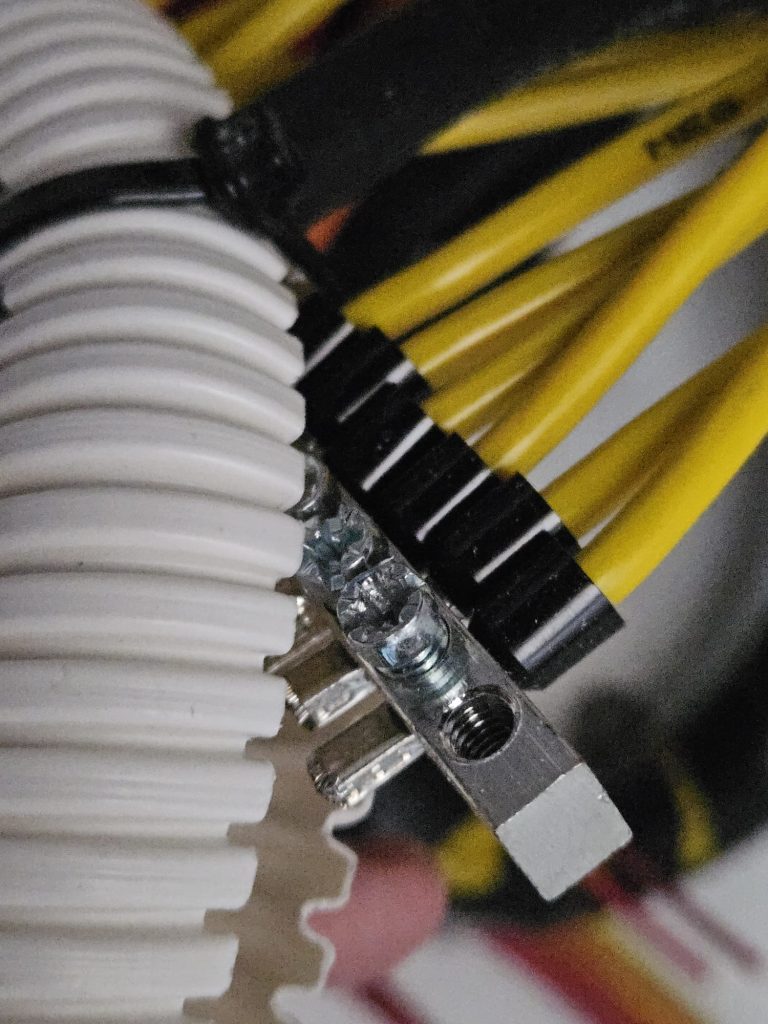
I also recommend putting a cable tie on the POE injector terminal connector, it pops out rather easily otherwise:
Because on my boat I have a fixed table with a bottom cupboard in the saloon, I was able to re-use the wires for the table (the wiring loom on all the boats is the same regardless of options). The cable goes from the fuse box to the switch panel in the pantry and then from the switch to the technical room. Perfect.
The only thing that has to be done is change the fuse to 15A or 20A at the fuse box, because the standard one is 10A and the maximum input current of the DC-DC converter is 13.5A, or you can just move the positive wire to one of the unused aux fuses instead, that is already the right size (which is what I did).
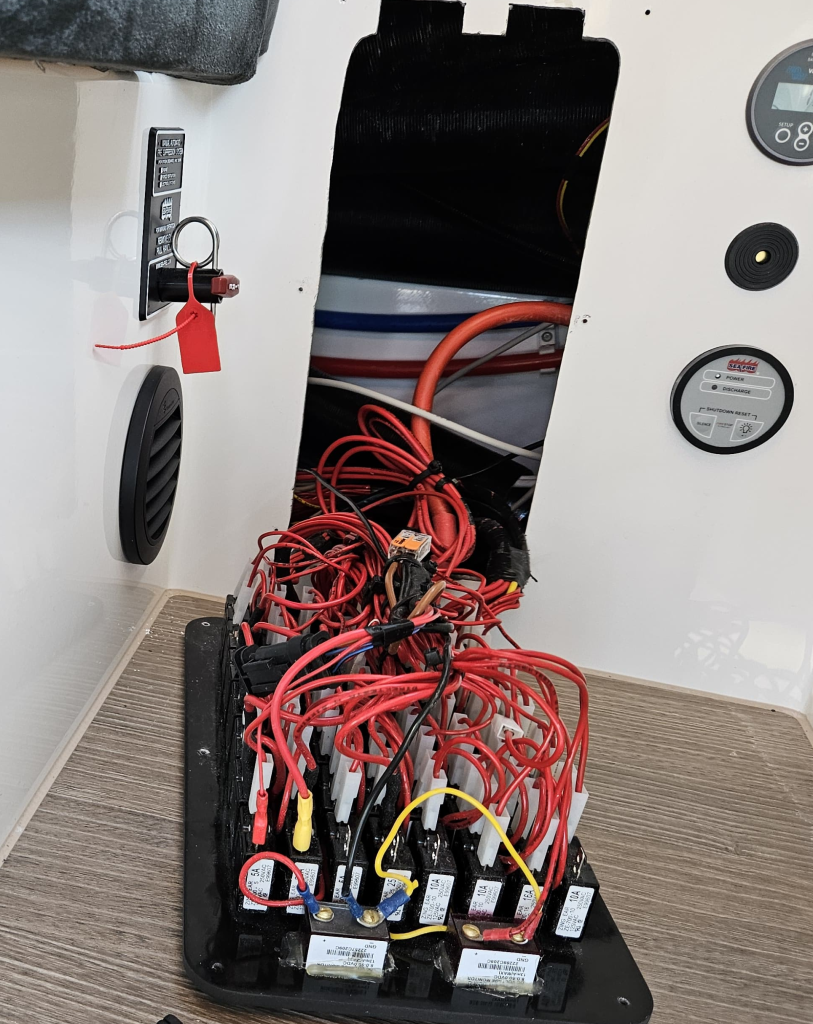
For the ground there’s a big ground bus right in the technical room with spare places.
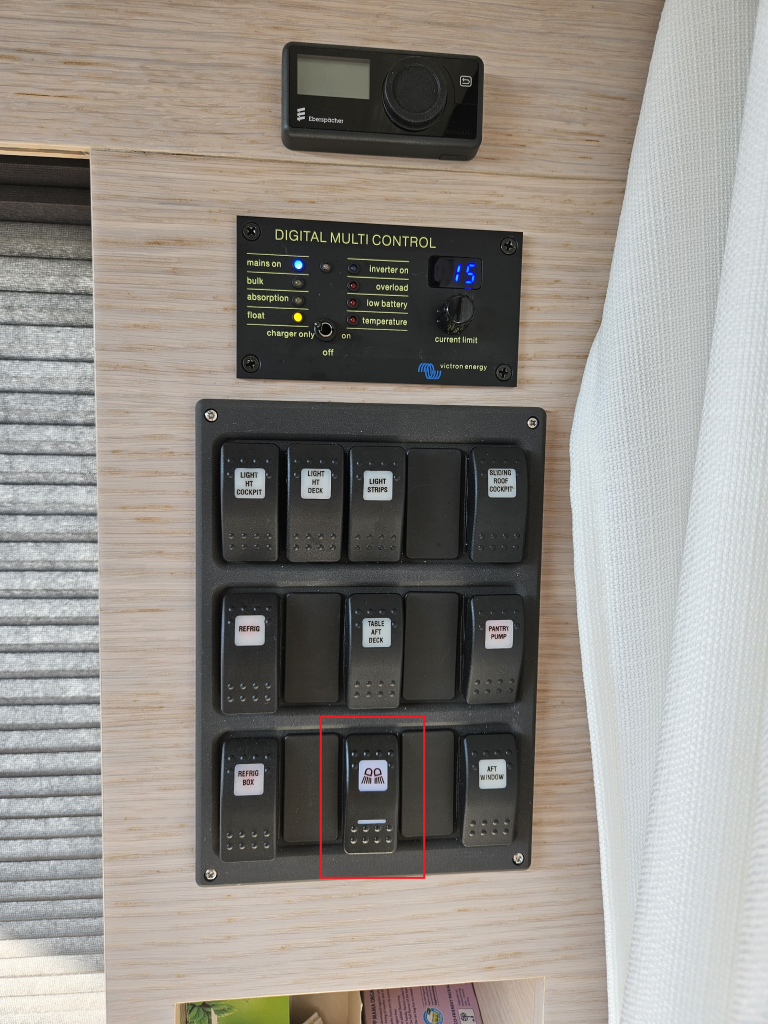
I added a switch in the pantry panel with which I can switch the WiFi router and dish on and off. The switches are made by Carling.
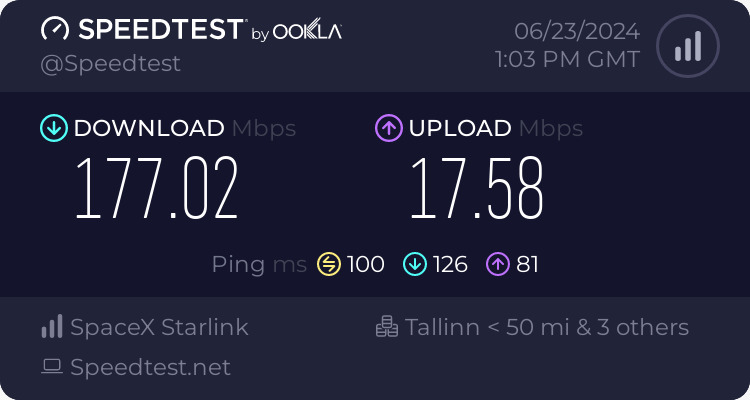
Conclusion
There is now onboard satellite connected WiFi. This can be put on pause at any time, so in the off season you don’t have to keep paying for it. Expensive compared to a cellular plan, but the speed is always between 70 and 200mbit/s, even in remote areas with bad cellular reception: